Category: Blog

  • 7 Signs of Smart Alternator Failure to Watch For

    7 Signs of Smart Alternator Failure to Watch For

    Last Updated: November 12, 2026

    Quick Summary

    Smart alternator failure shows up as a flickering or returning battery warning light, dim or flickering lights, a battery that keeps going flat, misbehaving electrics, starting problems or stalling, intermittent charging, and dashboard warnings beyond the battery light. Because a smart alternator deliberately varies its output, a single voltage reading proves very little. If you recognise two or more symptoms, have the charging system tested.

    • A smart alternator is a computer-controlled charging unit that varies output based on load demand, battery condition and engine state.
    • If a new battery goes flat within a fortnight, test the charging system rather than replacing the battery again.
    • Testing a smart alternator takes a multimeter and ten minutes, but a single voltage reading proves very little.
    • Choose a multimeter with DC voltage resolution to 0.01V and min/max capture to catch intermittent fluctuation.
    • Voltage fluctuation from a failing battery sensor or module communication fault needs a scan tool, not a basic meter.
    Smart alternator playing up?Search verified local and mobile auto electricians across Greater Brisbane.

    Find a local auto electrician

    Table of Contents

    7 Signs of Smart Alternator Failure

    A smart alternator failure rarely starts with a dead battery, it begins as a flickering headlight, an intermittent warning light, or a battery that keeps going flat overnight.

    A smart alternator is a computer-controlled charging unit that varies output based on load demand, battery condition and engine state, rather than holding a fixed voltage, which makes failure hard to spot. Here are seven warning signs.

    1. Battery warning light that flickers or returns. An intermittent light points to a control or sensor fault.
    2. Dim or flickering lights. Voltage fluctuation shows up in lighting first.
    3. Battery keeps going flat. Repeated jump starts suggest the charging system is not replenishing the battery.
    4. Misbehaving electrics. Flickering gauges, radio dropouts and erratic power windows trace back to unstable supply voltage.
    5. Starting problems or stalling. Low voltage at cranking can stall a modern engine.
    6. Intermittent charging. Some days it charges, some days it does not, a classic smart-alternator symptom.
    7. Dashboard warnings beyond the battery light. Communication faults between the battery sensor, engine control module and charging control often surface as unrelated warnings.

    Watch out: a battery that keeps going flat is often replaced when the alternator is the real fault. If a new battery goes flat within a fortnight, test the charging system.

    If you recognise two or more symptoms, an auto electrician in Acacia Ridge can test 24V and heavy-vehicle charging systems, and an auto electrician in Archerfield handles batteries, starters and alternators for trucks, plant and fleet vehicles.

    How to Test Smart Alternator Voltage

    Testing a smart alternator takes a multimeter and ten minutes, but because a smart alternator deliberately changes its output, a single voltage reading proves very little.

    Check battery voltage at the terminals with the engine off, then at idle, then bring the load up with headlights, air conditioning and the demister and watch whether voltage holds or sags. A low reading on a smart system is not automatically a fault, since many vehicles intentionally drop charging voltage to reduce engine load, which is why a charging test needs a scan tool to read the control module’s own view.
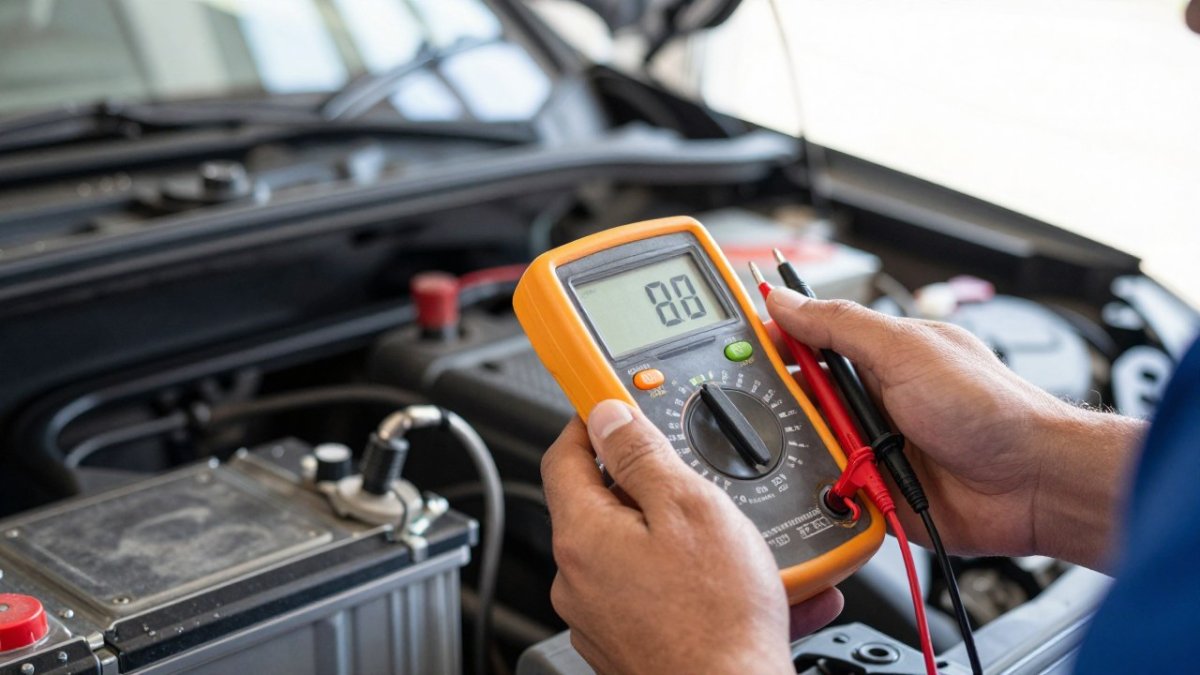
    Mechanic using a digital multimeter to test smart alternator voltage at a car battery
    Mechanic using a digital multimeter to test smart alternator voltage at a car battery

    If results are ambiguous or the fault is intermittent, a specialist charging system check is faster than guessing. You can find an auto electrician by area across the region, or an auto electrician in Virginia for intermittent fault diagnosis.

    Best Multimeter for Car Electrical Testing

    A basic digital multimeter with DC voltage, resistance and continuity ranges covers most at-home charging checks, you need one that reads DC volts accurately to two decimal places.

    • DC voltage resolution to 0.01V, so small charging differences are visible
    • Min/max capture, which catches intermittent voltage fluctuation a live reading misses
    • A clamp accessory or separate clamp meter for current draw testing on battery drain faults
    • Auto-ranging, which saves time when moving between voltage and resistance checks
    • A fused input and CAT rating appropriate to automotive work

    Where a multimeter stops being enough is at the control layer: voltage fluctuation caused by a failing battery sensor or a communication fault between modules will not show on a basic meter. That is a scan-tool job.

    For test gear, cable, fuses, connectors, relays and batteries, you can search the auto electrical parts range and use the buying guide before ordering.

    Symptom Likely Area First Check
    Battery keeps going flat Charging or battery drain Charging voltage test
    Dim or flickering headlights Voltage fluctuation Load-on voltage reading
    Intermittent charging Control module or sensor Scan-tool fault codes
    Flickering gauges Unstable supply voltage Earth and connector check

    A smart alternator fault that goes undiagnosed costs more than the repair: it takes batteries, starters and control modules with it. Auto Electrical Brisbane connects you with verified local and mobile auto electricians, area-specific guidance on how heat and salt air affect vehicle electrics, and a direct link to an extensive parts range. Search the directory to find a specialist near you, or claim your business listing if you are a qualified auto electrician serving the region.

    Frequently Asked Questions

    What are the common symptoms of a failing smart alternator?

    Look for a battery warning light that flickers or stays on, dim or flickering headlights, interior lights that pulse, and a battery that keeps going flat despite being new. Gauges may jump, electrical accessories can behave erratically, and the engine may stall or crank slowly. Because a smart alternator varies its output by design, voltage that swings between roughly 12.2V and 14.8V can be normal, so persistent low readings and repeat flat batteries are the stronger clues that the unit itself is failing.

    How do I test a smart alternator with a multimeter?

    Set the meter to DC volts and measure across the battery terminals with the engine off, then again with the engine idling and electrical loads switched on. A healthy charging system should lift voltage above resting level, though a smart alternator may drop output when the battery is full. Watch for a low voltage reading that never recovers or swings wildly. If your readings look borderline, a workshop charging test with a scan tool will confirm whether the alternator, battery sensor or control module is at fault.

    Should I use a DC-DC charger with a smart alternator?

    For most dual-battery setups in 4WDs, caravans and utes, yes. A smart alternator deliberately lowers charging voltage once the start battery is topped up, which can leave an auxiliary battery undercharged through a simple isolator. A DC-DC charger takes the variable input and delivers a stable, correct charge profile for the auxiliary battery. If you run fridges, camp lighting or work equipment, have the installer confirm the charger suits your alternator’s behaviour and battery chemistry before fitting.

  • Signs of Salt Air Corrosion on Car Electrics

    Signs of Salt Air Corrosion on Car Electrics

    Last Updated: November 11, 2026

    Quick Summary

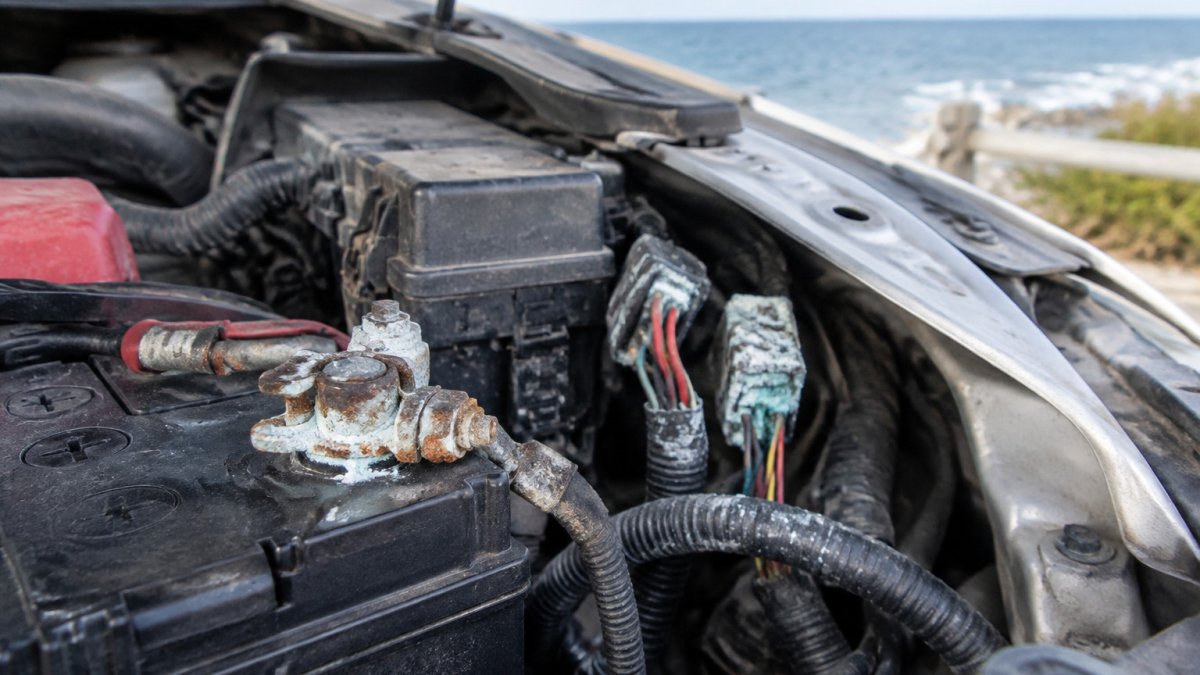
    Signs of salt air corrosion on car electrics include green or white powder on battery terminals, loose or discoloured clamps, and slow cranking. Hidden corrosion often shows up as flickering dash lights, intermittent power windows, or warning lights that come and go. Salt air corrosion spreads along wiring, so early checks matter.

    • Green, blue or white powder around battery posts is the most common visible sign.
    • Clamps that are loose, hard to turn or discoloured point to corroded terminals.
    • Slow cranking on cold mornings can mean corroded battery terminals creating resistance.
    • Flickering dash lights or intermittent windows often signal a poor connection in the harness.
    • Measure voltage drop under load: more than about 0.5 V across a connection indicates corrosion.

    Table of Contents

    How Salt Air Corrodes Vehicle Electrical Systems

    Salt air corrosion is one of the fastest ways a car’s electrics can fail, especially for vehicles that spend time near the coast or on Brisbane’s southside.

    Salt air corrosion is the slow breakdown of metal parts caused by airborne salt and moisture. If you want to see how a local auto electrician handles this in Brisbane’s industrial coastal area, auto electricians in Pinkenba lists the corrosion-related work they take on.

    Corrosion does not stay in one place. Once it starts inside a connector, moisture gets trapped and the damage spreads along the wiring. This is why a small patch of corrosion can lead to a fault far from where it began.

    Watch out: cleaning corroded terminals with water alone leaves residue that restarts the process. Dry the area fully and protect it afterwards.

    Visible Signs of Salt Damage on Car Battery Terminals

    Battery terminals are usually the first place salt damage shows. They sit in the open, they carry high current, and they are easy to overlook during servicing.

    White and green crusty deposits on car battery terminals caused by salt air corrosion in a driveway.
    White and green crusty deposits on car battery terminals caused by salt air corrosion in a driveway.

    Look for these signs on the battery:

    • Green, blue or white powder around the posts
    • Crusty build-up that lifts the clamps
    • Clamps that are loose, hard to turn or discoloured
    • Slow cranking on cold mornings

    Corroded terminals create resistance. That resistance makes the starter work harder and can leave you with a flat battery that seems fine after a jump start. A battery that drains faster than it should is worth checking for corrosion before replacing it.

    Green and white powder on terminals

    The green powder is usually copper sulphate or copper oxide, while the white crust is commonly a salt deposit. Both are poor conductors. Brush them off with a stiff nylon brush, then wipe the terminal clean. Replace the clamp if the metal is pitted, because a damaged clamp will keep losing contact.

    Electrical glitches that point to hidden corrosion

    Some corrosion never shows on the outside. Common warning signs include:

    • Dash lights that flicker when you hit a bump
    • Power windows or central locking that work only some of the time
    • Interior lights or radio cutting out
    • Warning lights that come on and then clear

    These symptoms often point to a poor connection in the wiring harness or fuse box rather than a failed component. A diagnostic check will usually find the fault faster than replacing parts one by one.

    A DIY Diagnostic Check for Corroded Wiring and Undercarriage

    Most guides list the symptoms and stop there. This section gives you the actual inspection sequence, the safe isolation steps and the readings that tell you whether a connection is corroded or simply loose.

    Isolate before you touch anything. Switch off the ignition, remove the key, and disconnect the negative battery terminal first, then the positive.

    1. Map the exposed connectors. Under the bonnet, check the fuse box lid seal, the main harness plugs near the strut towers, the alternator plug, the starter solenoid terminal and the ECU connectors. Look for green or white deposits, blackened pins, swollen insulation and any plug where the latch is cracked. A connector that has been wet long enough will show a tide mark of dried salt on the housing.
    2. Inspect the undercarriage runs. With the torch, follow the chassis rails, the fuel tank sender wiring, the rear wheel-arch loom and the trailer plug harness. Salt spray collects where the loom passes through a grommet or clips to the body. Look for split conduit, green powder inside the split, and clips that have rusted through.
    3. Test continuity correctly. Set the meter to continuity or the lowest ohms range. Probe the same circuit at both ends, not across the connector faces. A healthy run reads close to zero ohms. A reading that climbs while you wiggle the loom points to a broken strand or a corroded crimp rather than a clean break.
    4. Measure voltage drop under load. This is the step most DIY guides skip. Reconnect the battery, switch on the circuit (headlights, blower fan or starter crank) and measure DC volts between the battery positive post and the load side of the connector. More than about 0.5 V drop across a single connection is a sign of resistance from corrosion. Repeat on the earth side between the battery negative post and the component body; more than about 0.2 V is worth investigating.
    5. Check the earth points. Find the main earth strap between the engine block and the body, plus the earth points behind the kick panels and in the boot. Undo each bolt, look for white powder under the eyelet, clean to bare metal and refit with a star washer. A corroded earth can make every other test on the car read strangely.
    6. Inspect the trailer plug. If you tow, open the 7-pin or 12-pin plug and check for green pins and water inside the boot. Salt water enters through the cable gland and sits in the plug body.

    Watch out: probing a live connector with the meter set to resistance can damage the meter and the module. Always confirm the meter setting before you touch a pin, and never bridge pins with the probe tips.

    Record each reading and the connector location. A workshop can use that record to go straight to the fault.

    The article’s diagnostic sequence gives these readings and steps to check for corrosion, in order.

    Check Reading or action Meaning
    Connection voltage drop under load More than about 0.5 V Resistance from corrosion
    Earth voltage drop under load More than about 0.2 V Earth point needs investigating
    Continuity test Close to zero ohms Healthy circuit run
    Continuity test Reading climbs when loom is wiggled Broken strand or corroded crimp
    Isolation wait before unplugging airbag or ECU At least ten minutes Residual charge may remain
    Trailer plug inspection Green pins or water in boot Salt water entering through gland

    Choosing an Anti-Corrosion Spray for Car Wiring

    There are three product families that matter for electrical corrosion, and they are not interchangeable. Choosing the wrong one can either insulate a contact you need to conduct or trap moisture against the pin.

    Dielectric grease is a non-conductive silicone or synthetic grease.

    Anti-corrosion sprays are usually petroleum or lanolin-based and are designed to displace water and leave a soft film.

    Conformal sealants and liquid electrical tape cure to a flexible film and are best for a repaired joint or a splice that has been soldered and heat-shrunk.

    When comparing labels, check for these points:

    • A stated dielectric strength and a temperature range that covers under-bonnet heat.
    • Compatibility with plastic connector housings and rubber seals; some solvent-based sprays swell EPDM seals.
    • Whether the product is safe on live circuits, because some sprays are flammable until the carrier evaporates.
    • A clear instruction on cure time before the connector is re-mated.

    Apply protection after cleaning, never before. Spraying over existing corrosion traps the salt under the film and keeps the reaction going.

    Watch out: silicone grease that contains a conductive filler is sold for some applications, but it is not a substitute for a clean, tight terminal.

    Compare the label against these points rather than the marketing name. Compare the label against these points rather than the marketing name, and clean the terminal before applying any product.

    What Auto Electrical Corrosion Repairs Typically Involve

    Repair work depends on how far the corrosion has spread. A workshop usually starts with a full inspection, then cleans or replaces the affected parts.

    Common steps include:

    • Cleaning or replacing battery terminals and clamps
    • Repairing or replacing damaged wiring and connectors
    • Cleaning earth points and re-securing them
    • Testing circuits to confirm the fault is fixed
    • Applying protective sealant to exposed connections

    Costs vary with the vehicle, the number of faults and the parts needed. Pricing depends on the vehicle, the number of faults and the parts needed. For current pricing, contact Auto Electrical Brisbane through its website and ask for a quote based on your vehicle.

    Repairs are not always a single visit. Intermittent faults can take longer to track down, so ask the technician how they plan to confirm the fix.

    Booking a Corrosion Check Before the Next Coastal Trip

    Check your electrics before a coastal or boating trip, when salt exposure is high. Address any corrosion before you travel, because a fault on the road is far more expensive to deal with.

    If you have spotted corrosion or any of the warning signs above, an auto electrician can inspect it properly. To learn more about battery problems in the heat, see car batteries in Brisbane heat. If you tow a boat through salt water, boat trailer wiring for Moreton Bay boaties covers the wiring issues that matter most.

    For a mobile check on Brisbane’s southside, book a corrosion check with AFG Car Diagnostics & Repairs to have the wiring inspected before your next trip.


    BUTTON: Book Your Corrosion Check
    CARD_TITLE: Is salt air hurting your car’s electrics?
    CARD_TEXT: Auto Electrical Brisbane helps Brisbane drivers find local auto electricians for salt-related electrical faults.

    Frequently Asked Questions

    What are the early signs of electrical corrosion from salt air?

    The earliest signs are usually small and easy to miss. Look for white or green powder on battery terminals, fuse box connectors and earth points. Lights that flicker or dim, and accessories that work intermittently, often point to corroded connector pins before any visible damage appears. A musty smell from wiring under the dash or a fuse that blows without an obvious cause are also worth investigating. Catching these early keeps a simple cleaning job from becoming a harness replacement.

    Does salt air cause permanent damage to car wiring?

    It can. Corrosion builds up inside connectors and on copper strands, raising resistance and eventually breaking the electrical path. Surface corrosion caught early can usually be cleaned and sealed, and the wire is often fine afterwards. Once strands are badly corroded or insulation has cracked, the affected section typically needs repairing or replacing. Dielectric grease and sealed connectors reduce the risk of that damage progressing.

    How can I protect my car’s electrical system from coastal humidity?

    Start by keeping battery terminals clean and coated with dielectric grease or a terminal protector. Wash the undercarriage with fresh water after drives near the coast, paying attention to the fuse box area and wiring looms. Park under cover where possible, and check that door and boot seals are intact so moist air does not build up inside the cabin. Inspect connectors every few months if you regularly drive near the water.

    What components are most vulnerable to salt air corrosion?

    Battery terminals, earth straps, fuse and relay connectors, alternator and starter connections, and exposed wiring near the chassis are the most vulnerable. Sensor connectors on the undercarriage and under the bonnet also corrode quickly, as do electrical ground points bolted to the body. These areas combine moisture, salt deposits and dissimilar metals, which speeds up the process considerably.